Disabling a Hyperlink Using jQuery

HTML doesn’t provide a direct way to disable a hyperlink. If we are to do this ourselves, two things need to be done:

  1. Grey out the link.
  2. Completely replace the <a> tag with a <span> but preserve the children.

Let’s say, we  start with a link:

<a href="example.com"><img src="/img/link.png"/> A Link </a>

We can create style called “disabled”:

.disabled { 
  filter: alpha(opacity=30); 
  -moz-opacity:0.3; 
  opacity: 0.3
}

Apply the class to a disabled link to get the greyed out look.

<a href="example.com" class="disabled"><img src="/img/link.png"/> A Link </a>

Finally, to replace the link with a span, use this script:

$(function() {
    $("a.disabled").each(function() {
        var link = this;
        var label = document.createElement('span');
        label.className = "disabled";
        label.innerHTML = link.innerHTML;
        link.parentNode.replaceChild(label, link);
    });
});

Storing Password Hash in MySQL

Storing password as hashed in the database is much more secure than storing either encrypted or plain text password. In MySQL, you can use a BLOB column to store the hash value.

create table UserLogon ( 
 userId integer NOT NULL,
 password blob NOT NULL,

 PRIMARY KEY (userId)
);

To insert data using SQL, use a hexadecimal format for the blob. For example:

insert into UserLogon(userId, password) values (
    (select id from UserProfile where email='user@example.com'),  
    x'5BAA61E4C9B93F3F0682250B6CF8331B7EE68FD8');

An utility that hashes a plain text password and then converts it to hex can come handy to populate the database using SQL. Here is a Java example:

import java.io.UnsupportedEncodingException;
import java.security.MessageDigest;
import java.security.NoSuchAlgorithmException;
import javax.xml.bind.DatatypeConverter;

private static String getPasswordHashText(String password)
    throws NoSuchAlgorithmException, UnsupportedEncodingException {
    MessageDigest digest = MessageDigest.getInstance("SHA-1");
    digest.reset();
    byte[] hash = digest.digest(password.getBytes("UTF-8"));
    return DatatypeConverter.printHexBinary(hash);
}

Finally, in the server side code, do authentication like this:

public UserProfile authenticateUser(String email, String password) {
    try {
        byte hash[] = getPasswordHash(password);
        UserProfile u = getUserByEmail(email);
        UserLogon l = getUserLogon(u.getId());

        if (Arrays.equals(hash, l.getPassword())) {
            return u;
        }
    } catch (Exception e) {
        logger.log(Level.SEVERE, "Login failed", e);
    }
    return null;
}
private byte[] getPasswordHash(String password)
 throws NoSuchAlgorithmException, UnsupportedEncodingException {
    MessageDigest digest = MessageDigest.getInstance("SHA-1");
    digest.reset();
    byte[] hash = digest.digest(password.getBytes("UTF-8"));
    return hash;
}

Create a Web Site for Your GitHub Repository

You can host a web site with GitHub that goes with your repository. This is a great way to show documentation, tutorials and so on for your project. GitHub gives you a web based tool to create a one page site. You can build a more complex web site from there. This post will show you how to do that.

Create the One Page Site

Log into Git Hub. Go to your repository’s page. Click Admin link. From the GitHub Pages section, click Automatic Page Generator. Feel free to enter some initial text for the page. Then click Continue to Layouts at the bottom. Choose a layout and click Publish. It takes about 10 minutes for the changes to take place. After that, you should be able to see your site. For example, if my repository is called MyProject, the URL will be http://bibhas2.github.com/MyProject/.

GitHub will create the necessary HTML and other files. They will be committed within the repository in the gh-pages branch. To manually maintain new pages and other files, you will need to work with that branch.

Manually Manage the Site

First, in your workstation, clone the gh-pages branch of the repository. For example, if your repository is called “MyProject”, run this command to clone it:

git clone https://github.com/bibhas2/MyProject.git -b gh-pages

Now, if you go inside the repository folder, you will see the web site files.

drwxrwxr-x 2 wasadmin wasadmin 4096 Nov 23 13:27 images
-rw-rw-r-- 1 wasadmin wasadmin 9176 Nov 23 13:30 index.html
drwxrwxr-x 2 wasadmin wasadmin 4096 Nov 23 13:27 javascripts
-rw-rw-r-- 1 wasadmin wasadmin 7527 Nov 23 13:27 params.json
drwxrwxr-x 2 wasadmin wasadmin 4096 Nov 23 13:27 stylesheets

Edit the files as you see fit. Then push the changes out to update the site.

git commit -a
git push origin

Refresh your sites web page to see the changes.

Easy Java Profiling Using Java VisualVM

Java VisualVM is a tool that ships with Oracle JDK that makes profiling any Java application a piece of cake. In this post, I will show how to profile a server side application running on Tomcat. The approach will be same for any Java application (JBoss, WebSphere, command line, what have you).

Basic Usage

First, start the tool. From the <JDK>/bin folder, run:

./jvisualvm

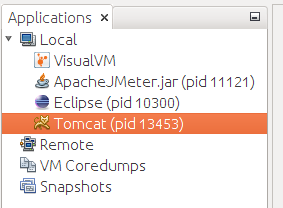
Then, start the Java application. In my case, I started Tomcat. If you are in development, you can start the server from Eclipse. How you start the Java application has no impact on the tool.
image

The Applications pane will show all Java applications (JVM) running in the local machine. In our case, we see that tomcat is running.

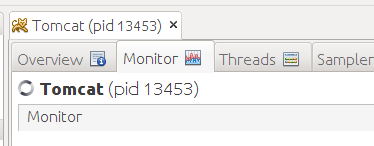
Double click on the application to start working on that.
image

Click the monitor tab to get a high level overview of CPU and memory usage.

image

The CPU pane also shows GC performance. In the example above, only about 0.3% of the time is spent doing GC. Which is pretty good.
image

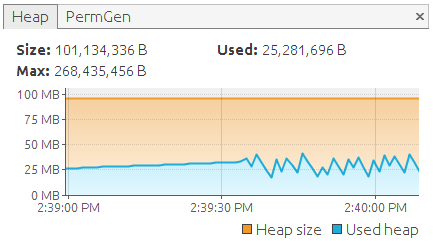
The Heap pane shows the current heap size and used space very nicely.

Heap Dump Analysis

A heap dump file has information about every Java object in memory and their relationships. Comparing two heap dump files taken before and after a stress test can show any object that may be leaking.
image

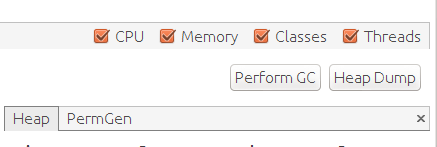
Before you run a stress test, first click Perform GC and then click Heap Dump. Run the stress test. Then do another GC and take a heap dump.

image

For a heap dump, click the Classes button and then Compare with another heap dump.

CPU and Memory Profiling

image

The tool offers two tabs for profiling – Sampler and Profiler. I am not sure what the difference is. For me, Sampler seems to work much better and faster.

image

Click either CPU or Memory button to start profiling. Run a stress test. Then click Stop to stop gathering data.

image

You can filter the list by entering a search string at the bottom.

Summary

Java VisualVM is one of the simplest to use profiling tool I have seen. I encourage you to try it out.

JSON Serialization Using Jackson

The JAXB API in Java can serialize objects to XML. But, no such API exists for JSON. This is surprising considering JAX-RS requires the support for JSON format. Jackson framework is here to fill that gap. For example, Jersey (an implementation of JAX-RS) uses Jackson as the JSON serializer.

If you plan on doing JSON communication from a RESTful service, use your server’s JAX-RS support. That will be the recommended approach. In some cases, you may need to work with JSON outside the context of a RESTful service. For example, save JSON documents on file. In that case, you can use Jackson. In this post, we will learn how to do that.

Download Jackson

Go to the download page and download these JAR files:

  1. Core
  2. Annotations
  3. Databind

Most applications will use the databind API. That JAR file needs the other two in the list.

Write Test Code

Create a Java project and add all three Jackson JAR files to the build path.

Write a class following this example.

import java.util.ArrayList;
import com.fasterxml.jackson.databind.ObjectMapper;

public class Person {
String name;
int id;
float salary;
public String getName() {
    return name;
}
public void setName(String name) {
    this.name = name;
}
public int getId() {
    return id;
}
public void setId(int id) {
    this.id = id;
}
public float getSalary() {
    return salary;
}
public void setSalary(float salary) {
    this.salary = salary;
}

public Person(String name, int id, float salary) {
    super();
    this.name = name;
    this.id = id;
    this.salary = salary;
}
public Person() {
}

public static void main(String[] args) {
    try {

        ObjectMapper mapper = new ObjectMapper();
        ArrayList<Person> list = new ArrayList<Person>();

        list.add(new Person("Bugs Bunny", 1, 23.45f));
        list.add(new Person("Daffy Duck", 2, 23.45f));
        list.add(new Person("Samity Sam", 3, 23.45f));

        mapper.writeValue(System.out, list);
    } catch (Exception e) {
        e.printStackTrace();
    }
}

}

When you run this, the program should print this out.

[{"name":"Bugs Bunny","id":1,"salary":23.45},
{"name":"Daffy Duck","id":2,"salary":23.45},
{"name":"Samity Sam","id":3,"salary":23.45}]

Congratulations. You have now developed a JSON application using Jackson.